Establishing the method of delivery will help you with planning your deliveries later in the system. You can also establish contact information as well as other vital information that is necessary to handle your clients needs. This tab will use a lot of auto-fill information from when you created your settings and your new customer information.
View the How-To Video HERE: Delivery Tab
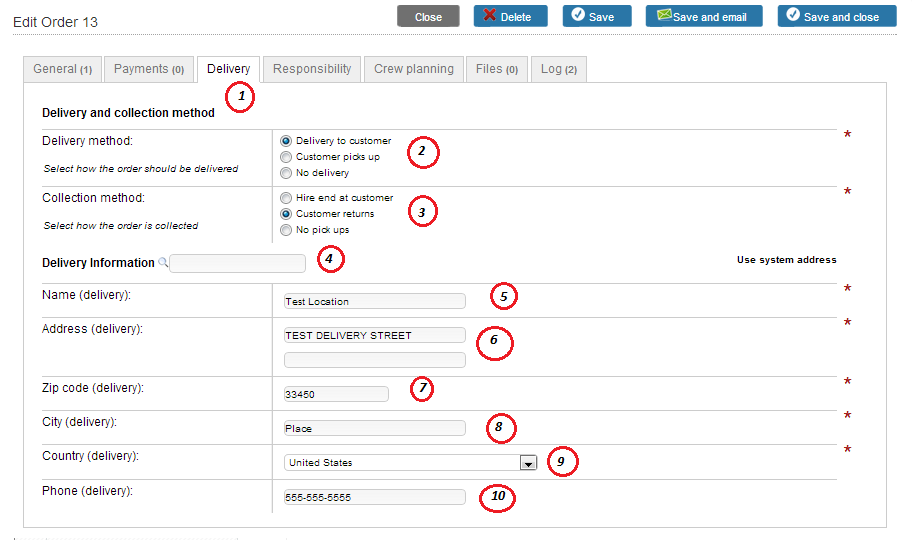
1) Delivery Tab
2) Delivery Method Selection – Toggle between Delivery, Pick Up and No Delivery. This will create a starting point for your products as they leave your inventory.
3) Collection Method Selection – Toggle between leaving the products for your customer, customer returning or No-Pick ups scheduled. This will affect the form fields below.
4) Delivery Information Search Field – If you have a regular vendor that you provide products to routinely, you can use the search field to automatically pull up their delivery information. This can save a lot of time when filling out these fields.
5) Name (Delivery) Field – Enter the name of the person who will be responsible for accepting the delivery at the location.
6) Address (Delivery) Field – Enter the street address of where the delivery is going.
7) Zip Code (Delivery) Field – Enter the zip code of the address where the delivery is going.
8) City (Delivery) Field – Enter the city where the delivery is going
9) Country (Delivery) Drop Down – Use the menu to select the country that the delivery is going to.
Phone (Delivery) Field – Enter the contact phone number for the person who will be accepting the delivery.
0 Comments