Depending on the RentalTrax system that you signed up for, you are allotted a certain amount of Users. To setup Users within your system, go to: Settings > Users
View the How-To Video Here: USERS
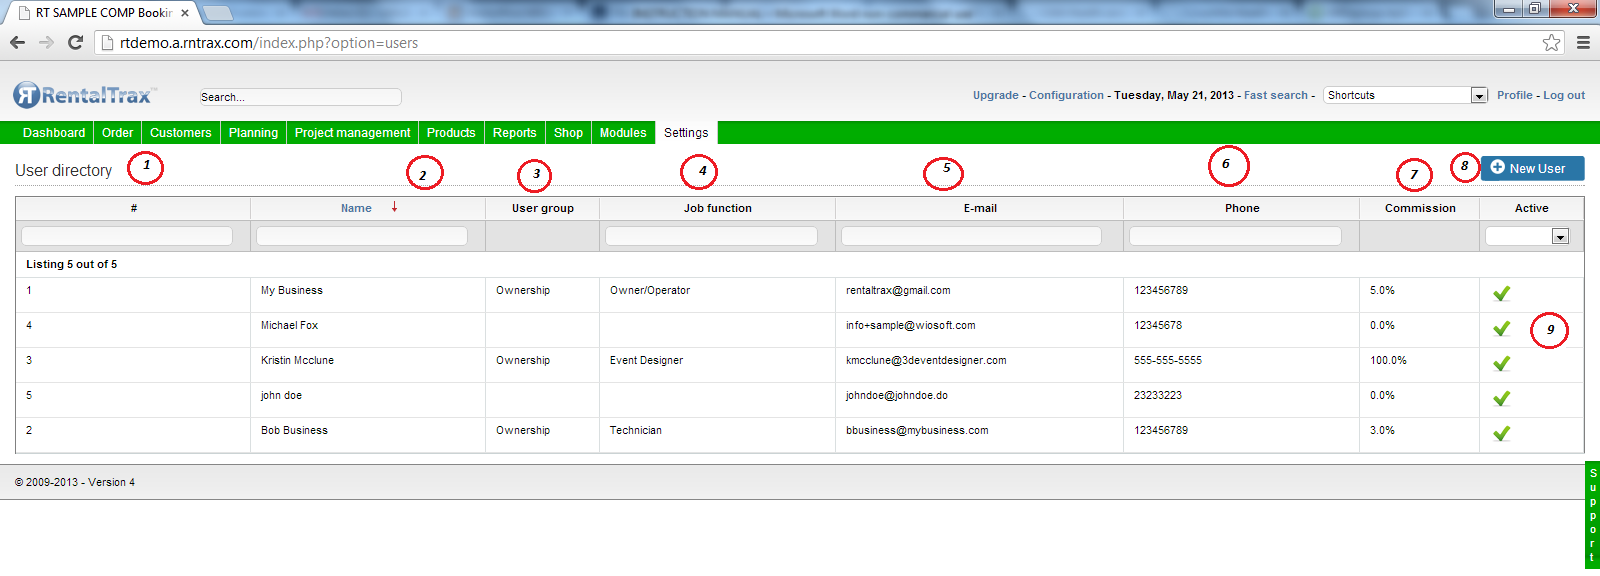
1) User Directory Title
2) Name Column
This column provides a list of your Users by name. This column can be sorted by entering names in the text field, or by clicking on the title bar.
3) User Group Column
This column provides the corresponding User Group based on the Users name. User Group Creation is explained in step Nine. This column can be sorted by entering user groups in the text field, or by clicking on the title bar.
4) Job Function Column.
This column provides the corresponding Job Function as created within the User based on the User name. This column can be sorted by entering Job Functions in the text field, or by clicking on the title bar.
5) E-Mail Address Column
This column provides the corresponding e-mail address as created within the User based on the User name. This column can be sorted by entering e-mail addresses in the text field, or by clicking on the title bar.
6) Phone Number Column
This column provides the corresponding Phone Number as created within the User based on the User name. This column can be sorted by entering Phone Numbers in the text field, or by clicking on the title bar.
7) Commission Column
This column provides the set Commission Rate for the User as created within the User Creation screen based on the User name. This column cannot be sorted.
8) New User Creation Button
9) Active Column
A green check mark in this column denotes that the User is active within the system.
User Creation Screen
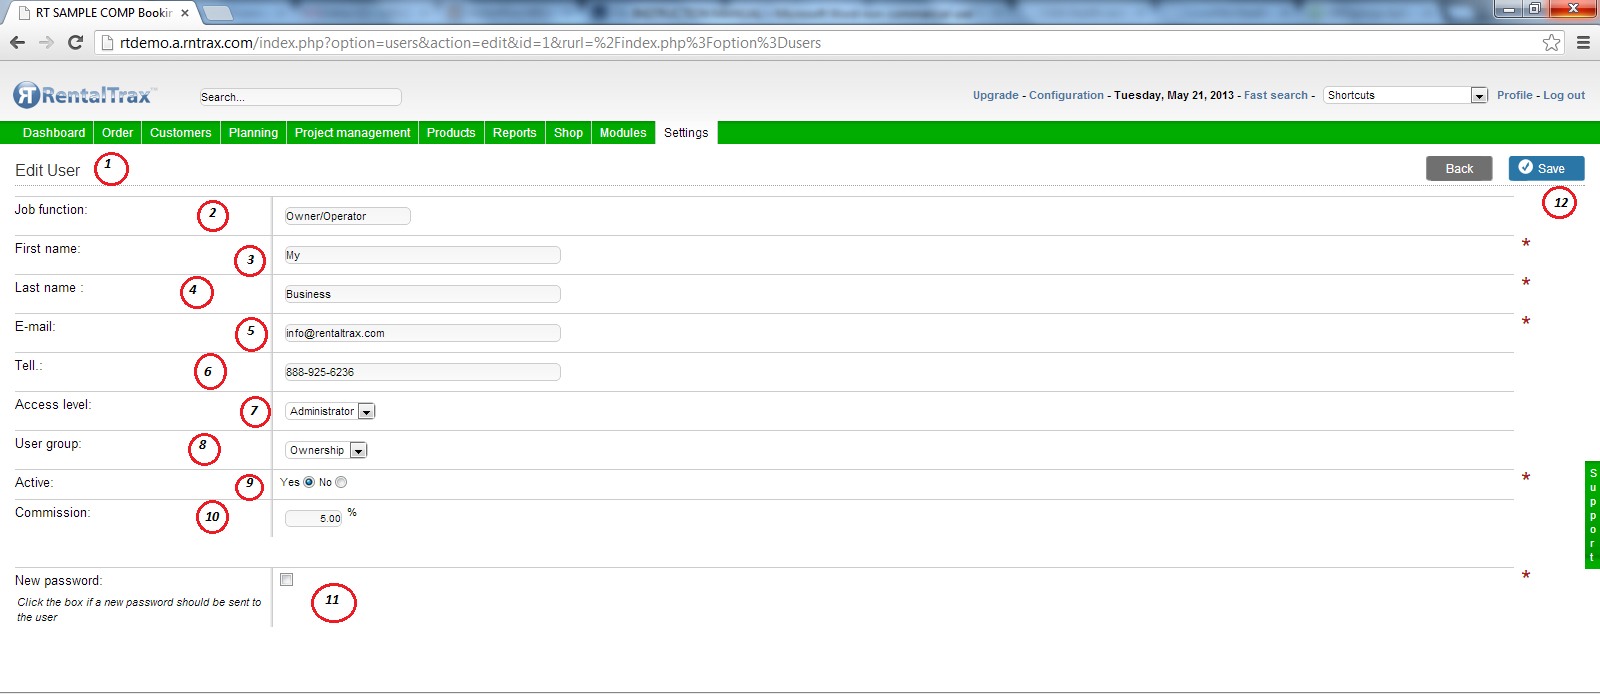
Once you have clicked on the New User Creation Button you will be brought to the Edit User Screen
1) Edit User Title
2) Job Function
You can create whatever Job Function title you wish for the new user. This will help you with reporting and searching based on Job Function when using the system.
3) First Name – Enter the first name of the new user here
4) Last Name – Enter the last name of the new user here
5) E-mail Address – Enter the new users E-Mail address here. Ensure that the address is correct as the main form of communication within RentalTrax is done through e-mail.
6) Telephone – Enter the new users Telephone number here. This is the number that will be used when using the dynamic field {{user_tell}}
7) Access Level
Setting the access level for your users is very important. The access level will grant permission to that user to be able to see or modify content based on their granted permission. The dropdown menu allows you to select from four options: User, Super User, Order User and Administrator.
User: Limited permissions. Must be tagged to an order to have permission to see the order within their system. Sample job functions – Warehouse, Maintenance, etc.
Super User: Semi-limited permissions. Able to see and modify orders that they are tagged in. Cannot create new orders from scratch. Sample job functions – Warehouse Packing, Maintenance Administration, Supervisory Positions.
Order User: Almost Full permissions. Able to create new orders, see all orders and modify limited content. Cannot see financials or reports within the system. Sample Job Functions – Sales, Order Placing, etc.
Administrator: Full permissions. Able to maintain full access to the system. (Owner)
8) User Group Dropdown
User groups were created in Step nine and can be assigned to the User here.
9) Active
Toggle between “Yes” and “No” to denote whether the User is Active in the system or not. You cannot remove a user from the system permanently, so when they leave the business, you must make them inactive by selecting “No”
10) Commission Rate
Here you can set the commission rate that the User will receive. You will be able to pull reports to find out the commission amount owed to the User by going to Reports > Commission
11) New Password Check Box
If a User has forgotten their password, you can send them an e-mail containing a new Computer Generated password by clicking on this check box and clicking the Save button.
12) Save Button


2 Comments